Configuring DHCP and NAT in VirtualBox
Introduction
We demonstrate setting up a small private subnet where clients are assigned IP using DHCP. Then, we configure NAT to connect the private subnet to the Internet through the server. For this demo, the server will act as the DHCP server, NAT server, and gateway router.
DHCP Configuration
Create two virtual machines (1 server and 1 client). On both guests, enable internal networking through VirtualBox settings. Both guests must be on the same internal network for this to work.
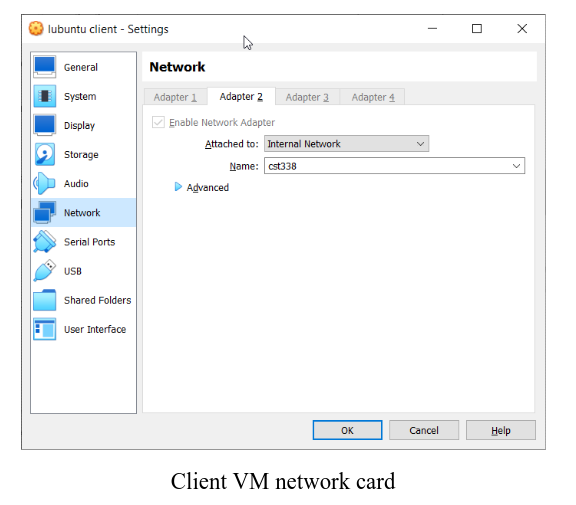
On the server VM, attach an additional network card with NAT networking mode.
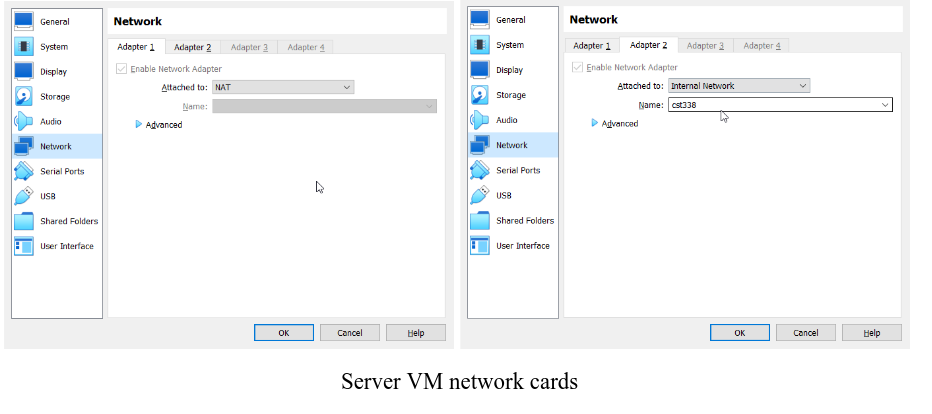
Basically, the server needs two interfaces. The DHCP server will be listening on the “internal” interface, and the other interface will provide Internet connection.
Server Side
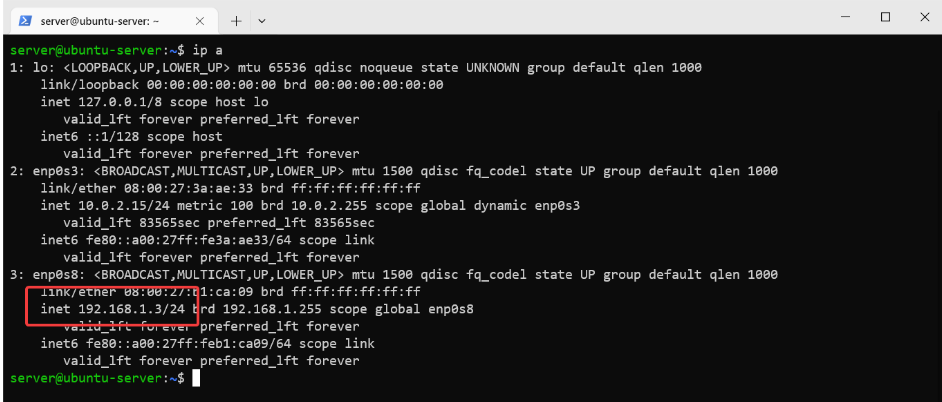
Configure the internal network card. To determine the interface run ip a.
In my case, this will be enp0s8.
We will configure a static IP for this interface, as the DHCP server’s IP must be known.
To do this, create a new yaml file in /etc/netplan.
# /etc/netplan/server.yaml
network:
  version: 2
  renderer: networkd
  ethernets:
    enp0s8:
      dhcp4: false
      addresses:
        - 192.168.1.3/24 # Your static IP
To apply the changes, run sudo netplan apply.
Install the DHCP server.
sudo apt install isc-dhcp-server
Configure the range of IP addresses to assign in dhcpd.conf.
# /etc/dhcp/dhcpd.conf
default-lease-time 600;
max-lease-time 7200;

subnet 192.168.1.0 netmask 255.255.255.0 {
 range 192.168.1.150 192.168.1.200;
 option routers 192.168.1.3;	# The DHCP server will act as the gateway router
 option domain-name-servers 8.8.8.8, 8.8.4.4;
}
Edit /etc/default/isc-dhcp-server to make dhcpd listen on enp0s8.
# /etc/default/isc-dhcp-server
INTERFACESv4="enp0s8"
Restart the DHCP server.
sudo systemctl restart isc-dhcp-server.service
Client Side
Configure the client’s network card to use DHCP. Create a new yaml file in /etc/netplan.
# /etc/netplan/dhcp-client.yaml
network:
  version: 2
  renderer: networkd
  ethernets:
    enp0s8:
      dhcp4: true
Apply the changes by running sudo netplan apply.
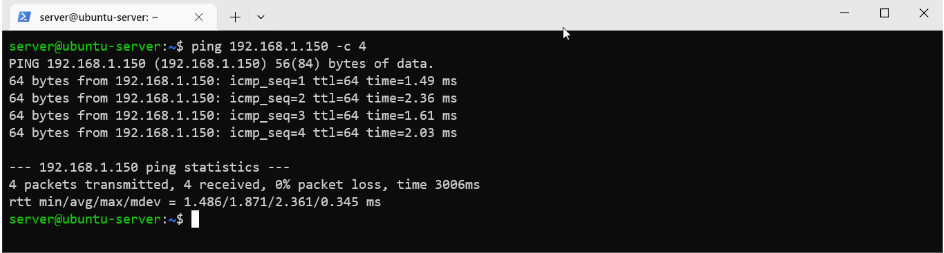
The client should be assigned an IP address in the 192.168.1.150 - 192.168.1.200 range now.
Run ip addr show | grep enp0s8 to check.

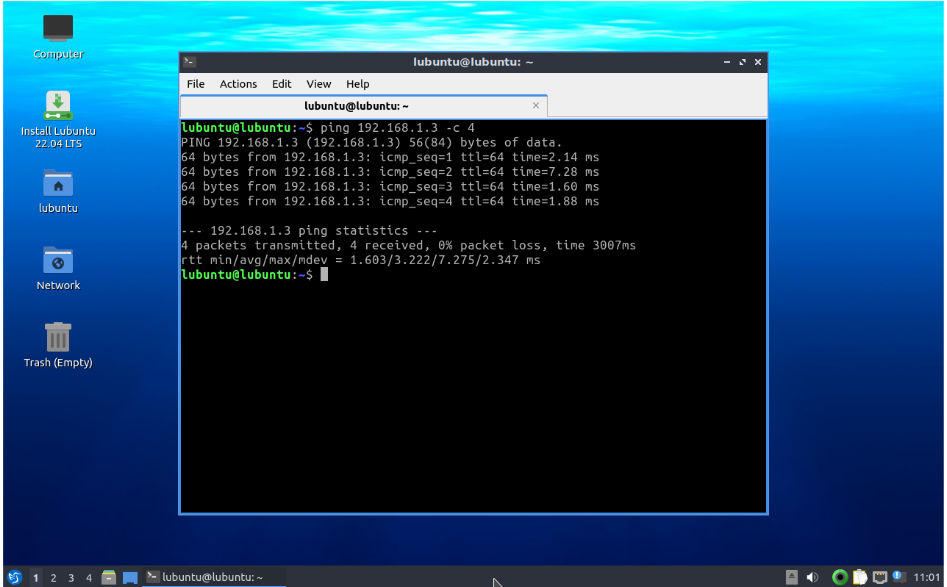
At this point, you should be able to ping between the server and client.
NAT Configuration
What is happening here is that the client only has 1 interface connected to the private network. Therefore, it has no access to the external network. You can try doing a web request, it won’t work :D
Basically, we will route Internet traffic through the internal network interface on the server to the other interface which has access to the Internet by using NAT.
We will use iptables for this.
To do this, you need to be root. Run sudo -i.
Then, enable IP forwarding on the server and set rules for forwarding the traffic between the interfaces.
echo 1 > /proc/sys/net/ipv4/ip_forward

iptables -t nat -A POSTROUTING -o enp0s3 -j MASQUERADE

iptables -A FORWARD -i enp0s3 -o enp0s8 -m state --state RELATED,ESTABLISHED -j ACCEPT

iptables -A FORWARD -i enp0s8 -o enp0s3 -j ACCEPT
If everything works, you should have Internet on the client now. Try visiting YouTube in the browser :D
Note: The IP forwarding option is disabled after a system reboot.
To make it persistent you need to write it in /etc/sysctl.conf.
You can do that by doing the following,
echo 'net.ipv4.ip_forward=1 | sudo tee -a /etc/sysctl.conf'
References
- https://www.karlrupp.net/en/computer/nat_tutorial